Service
Downspout and Drain Cleaning
For downspouts that discharge weakly or back up, where the fault sits in the line, not at the ground.
See prices and detailsIt is the simplest piece in the whole system: a heavy shallow trough under the downspout. Set well, it saves your soil, mulch and footing. Set badly, it does nothing at all.
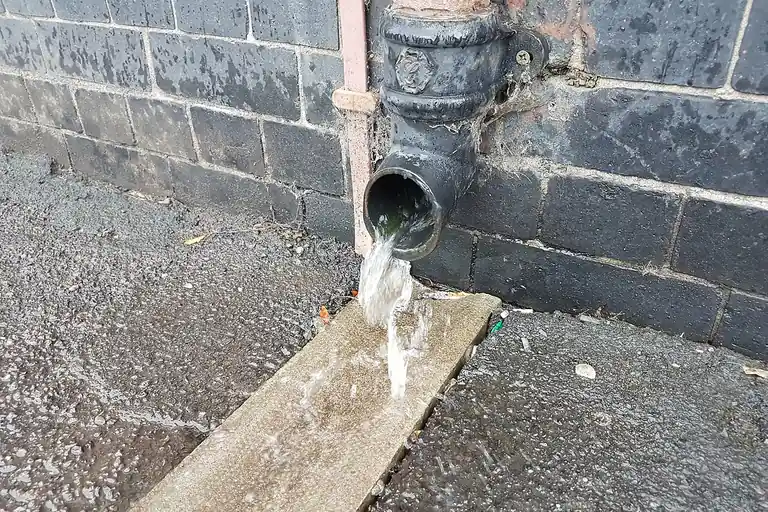
Photo: Downspout (43647598595) by oatsy40 from London, via Wikimedia Commons, CC BY 2.0.
Look at the base of a house with no protection under its downspouts and you will see the same record in the soil: a dug out hollow, mulch scattered wide, and a damp line along the footing. Concrete splash blocks exist to stop exactly that. The falling stream from a downspout lands hard in one spot, hour after hour in a storm, and a heavy block catches it, spreads it and sends it on its way as a thin, harmless sheet.
A block is a shallow trough set under the downspout outlet. It catches the falling stream, spreads it, and sends it away from the wall as a thin sheet, so soil, mulch and the footing stay in place. It works when it sits level, points downslope, and the yard falls away.
The job has three parts. First, the block takes the hit. Water dropping from a roof through a downspout arrives with force, and bare soil cannot stand it for long. The closed end of the block sits under the outlet and absorbs that impact on stone hard material instead of on your flower bed. Second, the channel slows and spreads the stream, turning a drilling jet into a wide, shallow flow. Third, the open end delivers that flow onto the yard a couple of feet from the wall, moving in the right direction.
That small change protects more than the planting. Soil washed away from the footing leaves the base of the wall exposed and lets later rain pool in the hollow the earlier rain dug. A gutter splash block, kept in line and level, breaks that cycle at almost no cost in money or upkeep. It is the last piece of the system, and the cheapest insurance in it.
A block does not move water away from the house by itself. It hands the water to the yard in good shape. If the yard then holds the water against the wall, the fault is grading or drainage, and no block, however well set, can fix it. Read the block and the ground as one system.
Most concrete splash blocks sold for homes run about 24 inches long and 11 to 12 inches wide, with a channel down the middle, low raised sides, and one end closed and raised to sit against the wall. That standard size suits a 2 by 3 inch downspout on a typical house. Homes with 3 by 4 inch downspouts, or valleys that send an unusual volume down one pipe, do better with a longer or wider block, so the full stream stays inside the channel at peak flow.
Shape matters more than material once the block is heavy enough to stay put. Look for a channel that widens slightly toward the open end, which spreads the sheet as it leaves, and sides high enough to hold a storm flow without spilling. A flat slab with no channel is a patio stone, not a splash block, and the stream will run off its sides and dig at its edges.
Setting takes ten minutes and decides everything. Clear the soil under the downspout, level a bed for the block, and firm it down so the block cannot rock. Sit the closed end tight under the outlet, centered so the stream lands in the channel, not on a rim. Then check the lay: level across its width, so water cannot spill over one side, and falling gently away from the wall along its length.
The ground beyond the open end must continue the job. Soil should fall away from the house, so the sheet of water keeps traveling instead of pooling at the end of the block. If the yard is flat, add a shallow soil swale or accept that the block is only the first half of the fix, and the discharge needs to travel farther by pipe.
Test with a hose at full flow into the gutter above. Watch the whole path: stream lands in the closed end, runs the channel without spilling, leaves the open end as a spread sheet, and moves away across the yard. Any hop, spill or back pooling shows up at once, and every one of them is a five minute fix while the tools are still out.
Blocks fail quietly. Frost heave and settling soil tilt them a little each year, until the channel tips sideways and pours its load off one edge, digging the very hollow the block was meant to prevent. A quick check each spring, level the bed, reset the block, restores it. Owners who never look at the base of the wall miss this for years, because the system above ground still looks perfect.
Cracks come from point loads and frozen standing water. A block set on one hard lump of soil takes the discharge impact on that lump and can split along the channel. A block that holds a puddle after rain, because it was set with a back fall toward the wall, freezes that puddle in winter and spalls at the surface. Both faults trace back to the bed and the lay, not to the concrete.
Bypassing is a sizing fault, not a setting fault. When roof area grows, say after an addition, or a valley is reworked onto one downspout, the old block may simply be too small for the new flow. Water jumps the sides at peak rain no matter how well the block sits. The answer is a bigger block, a second downspout sharing the load, or piping the discharge away from the wall entirely.
Some discharge points need more than a block can give. A flat yard that holds water, a basement that stays damp on the downspout side, or a path that ices where the sheet crosses it all say the water has to travel, not just land well. That is the point where an above ground extension or a buried line takes over, and the block retires or moves to a lighter duty downspout.
If the downspout itself delivers weakly, gulps, or backs up at its base, the fault sits in the line rather than at the ground, and clearing it is a service visit. That kind of work sits in the published repair range of $100 to $450 per job, depending on access and the length of line involved. Treat a published range as a guide only. The actual price for your home is decided after the line is tested, and it should come back as an itemized written quote fixed before work starts. Our downspout and drain cleaning page explains how a blocked line is tested and cleared.
For most homes, though, the humble block is the right answer and the whole answer. It asks for a level bed, a centered outlet and a spring reset now and then. In return it keeps the soil, the mulch and the footing where they belong, storm after storm, for the price of a bag of soil.
For downspouts that discharge weakly or back up, where the fault sits in the line, not at the ground.
See prices and detailsAbove ground options compared, for yards where water needs to travel farther from the wall.
Read the guidePipe choice, slope and outlets for lines that carry water underground to daylight.
Read the guideEvery piece of the system named in order, from end caps and miters to outlets and elbows.
Read the guideBrowse every guide on the Gutter Cleaning HQ blog, grouped by topic.
The closed, raised end goes under the downspout, against the wall, and the open channel points away from the house, downslope. Water lands in the closed end, runs down the channel, and leaves at the open end as a spread sheet. Fitted the other way round, the block throws water back at the footing.
You can, and plastic is easier to carry and set. The trade is weight. A light block shifts under a strong discharge, gets kicked out of line, and can crack in hard freezes once water sits in it. Concrete stays where it is set, which is the whole point of the piece, so most owners end up preferring it.
A standard block carries water about 2 feet from the wall and spreads it as it leaves. That is enough where the yard falls away and the soil is firm. Where the ground is flat or the discharge is heavy, the water needs to travel farther, and an extension or a buried line takes over from the block.
Usually the flow is wider than the block, the block sits tilted so water spills over one side, or the outlet of the downspout misses the closed end and lands beside it. Reset the block level, center it under the outlet, and watch one full discharge with a hose. The miss is easy to see and simple to correct.
Send a photo of the base of the wall after rain. We will say whether a block, an extension or line cleaning is the right fix, and quote it in writing.
Call +1 (888) 295-0648